Monday, 12 October 2020

Docker Compose / How to install Docker Compose on Ubuntu 16/18

Docker is a great tool for automating the deployment of Linux applications inside software containers, but to take full advantage of its potential each component of an application should run in its own individual container. For complex applications with a lot of components, orchestrating all the containers to start up, communicate, and shut down together can quickly become unwieldy.

The Docker community came up with a popular solution called Fig, which allowed you to use a single YAML file to orchestrate all your Docker containers and configurations. This became so popular that the Docker team decided to make Docker Compose based on the Fig source, which is now deprecated. Docker Compose makes it easier for users to orchestrate the processes of Docker containers, including starting up, shutting down, and setting up intra-container linking and volumes.

In this tutorial, we’ll show you how to install the latest version of Docker Compose to help you manage multi-container applications.

Prerequisites

Ensure you install docker on the host before install docker compose. 
You can install docker on Amazon linux with the below command

yum update -y

yum install docker -y

service docker start


service docker status


Install Compose on Linux systems

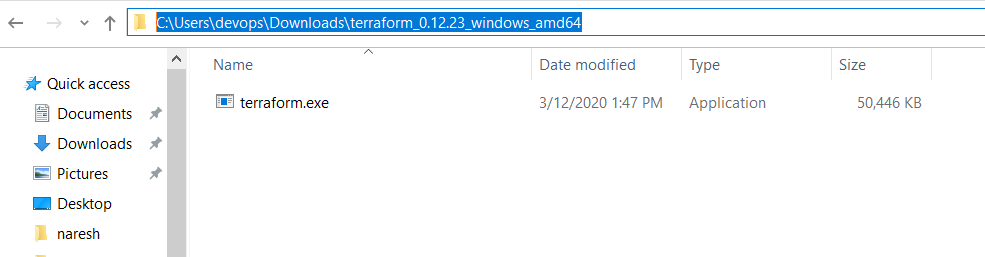
On Linux, you can download the Docker Compose binary from the Compose repository release page on GitHub. Follow the instructions from the link, which involve running the curl command in your terminal to download the binaries. These step-by-step instructions are also included below.

For alpine, the following dependency packages are needed: py-pippython-devlibffi-devopenssl-devgcclibc-dev, and make.

  1. Run this command to download the current stable release of Docker Compose:

    NOTE: to get the latest version (thanks @spodnet): 
  2. DOCKER_CONFIG=${DOCKER_CONFIG:-$HOME/.docker}
     mkdir -p $DOCKER_CONFIG/cli-plugins
     curl -SL https://github.com/docker/compose/releases/download/v2.23.3/docker-compose-linux-x86_64 -o $DOCKER_CONFIG/cli-plugins/docker-compose
    chmod +x $DOCKER_CONFIG/cli-plugins/docker-compose docker compose version


Terraform Open Source

 WHAT IS TERRAFORM?

Terraform is an open source tool used for automating and managing infrastructure and platform and services as well.


Benefits:

Supports multiple providers like AWS,  Azure, GCP.
Declarative – define what end result you want
Management of existing infrastructure
Efficiency
Consistency

INFRASTRUCTURE AS CODE
An infrastructure setup is required to run an application which consist of multiple resources.
Phases of Terraform:
  •      Code: This creates a terraform file and, in that file, it has resources and sets of arguments to support that.
  •      Init: This downloads the necessary plugins needed to provision your infrastructure.
  •      Plan: This is a Terraform CLI command used to compare the desire state to what actually exist so day 1 it will notice you have none of the resources so you have create them.
  •      Apply: This is also a Terraform CLI command which take those resources and spin them up. Terraform leverages cloud provider API to create infrastructure resources and outputs the variables along the way.


TERRAFORM INSTALLATION

Download Terraform


Download terraform from official website  https://www.terraform.io/downloads.html

You can see the Windows 32 bit and 64 bit source files. download depends on your system here I am downloading 64 bit terraform. it will be downloaded as zip file.

Unzip the Terraform package

Extract the downloaded zip file. Here I downloaded the terraform zip file in C:\Users\devops\Downloads\. After extracting the zip file, you can see a terraform.exe file as shown below in C:\Users\devops\Downloads\terraform_0.12.23_windows_amd64

install terraform on windows

This is the workspace path of terraform in your system or you can say the path of terraform.exe.


Set Terraform as an environment variable

Go to your Control Panel and navigate to Systems as shown below.  Click on Advanced System Settings then select environment variables, in system variables you can see “Path” select path and click on edit and add path of terraform i.e  C:\Users\devops\Downloads\terraform_0.12.23_windows_amd64


install terraform on windows 10

We are done, Terraform has been successfully installed!!!

Verify Terraform Installation

Open gitbash and run terraform as shown below


How to Dockerise a simple Web Application / Host on a Nginx Server

 Nginx, stylized as NGINX or nginx or NginX, is a web server that can also be used as a reverse proxy, load balancer, mail proxy and HTTP cache. This can be used to host web Applications.

In this lab exercise, you will learn how to create a simple web App, Create an Nginx container and deploy that App into the container. And view the results on your browser

Prerequisites: 

Install Docker


Step 1: Create the web App(HTML)

Log into your docker  machine

Create the Html file using Vi Editor

$ vi index.html


<!DOCTYPE html>

<html lang="en">

<head>

<title>Smashing Champions Web App!</title>

</head>

<body >

We are champions

we are champions!

</body>

</html>

Copy the Above code and paste on the editor. You can edit the body section as u please

Step 2: Create Dockerfile
open vi editor and copy the below code

$ vi Dockerfile
#FROM is the base image for which we will run our application
FROM nginx:latest

# Copy files and directories from the application
COPY index.html /usr/share/nginx/html

# Tell Docker we are going to use this port
EXPOSE 80


The above Docker file will create a base image from centos6 operating system, install nginx web server on it, then Copy the index.html file we created into "/usr/share/nginx/html" folder of the centos container. The image will be exposed in Port 80

Step 3: Create the docker image: You can tag it with -t , tag it any name you want. but we will use webapp

$ docker build -t webapp .
 
List docker images
$ docker images
You can see the base image we specified in the Dockerfile (centos), and the image created from it (webapp)

Step 4: Lets run our image
$ docker run -itd -p 8888:80 IMAGE_ID

Place your image id in place of  highlighted yellow


Step 5: Check if image is running

$ docker ps -a


Step 6: Go to your ip address:8888 (make sure u open this port in your security group


Saturday, 10 October 2020

DockerHub - How to create docker images from Container


An image is an executable package that includes everything needed to run an application--the code, a runtime, libraries, environment variables, and configuration files.

container is a runtime instance of an image--what the image becomes in memory when executed (that is, an image with the state, or a user process).

A Docker image can be version controlled just like code. As we store code in a repository like Git, Docker images can be stored in a Docker repository Hosting Service like Docker Hub.

Docker Hub is a service provided by Docker for hosting, finding, and sharing Docker Repositories. Just like git repo hosting services, a Docker repository can be public or private. A third-party repository hosting services also exists. The Docker Hub and other third party repository hosting services are called registries. For example, RedHat has their own registry to host their container images.

One important point to remember is that a registry has many repositories, while a repository has many different versions of the same image. These registries can be either private or public, depending on the needs of the organization. Docker Hub is one such example of a public registry.


Docker is configured to use Docker Hub as it's default registry. Use the

 $ docker info command to view the registry that Docker is currently using. By default, it points to https://index.docker.io/v1/ which is the registry location for Docker Hub.


On Docker Hub, there are two kinds of images - official and unofficialOfficial images are trusted and optimized. They have clear documentation, promote best practices, and are designed for the most common use cases. On the other hand, an unofficial image is any image that is created by a user. Docker Hub follows some standards so that both can easily be identified. Official images contain only the <image_name> as its image name but unofficial images have the syntax as <username>/<image_name>. Also, the official image has official written in the listing as shown in the below screenshot.

Official Image of Ubuntu


official_image

Unofficial Image by User ubuntuz

unofficial_image


Downloading Image from Docker Hub

Search the Docker Hub for Images

We could also look up and find images on Docker Hub by either using the search bar on the website or using the below command:

1
$ docker search <image_name>
shell

Let us search for an image with the name of busybox:


Pull an Image or a Repository from a Registry

To download a particular image, or set of images (i.e., a repository), use docker pull. If no tag is provided, Docker Engine uses the :latest tag as a default.

1
$ docker pull <image_name>:<tag_name>
shell

Let us pull the latest image of debian:


Lets list images we have: $ docker images -a

Creating a Docker Image

We could create our own Docker image in two ways:

1. Using Dockerfile to Create an Image

A Dockerfile is a simple text document that contains a series of commands that Docker uses to build an image. Several commands supported in Dockerfile are FROM, CMD, ENTRYPOINT, VOLUME, ENV, and more.See: https://violetstreamstechnology.blogspot.com/2020/10/all-you-need-to-know-about-docker.html on how to create docker image using Dockerfile


1
2
FROM busybox:latest
CMD ["date"]
dockerfile

Note: An important point to remember is that this file should be named as Dockerfile.

Create a dockerfile with vi: $ vi Dockerfile

Save the file


The docker build command builds an image from a Dockerfile. To build the image from our above Dockerfile : Use the below command:

Note: use  -t To tag your image

$ docker build -t example_image .

To build


Now, let’s run a container based on our image. You will find that it will print out the date as shown below:

$ docker run -it --name example_app example_image


2. Create an Image from A container Docker-hub

Another way to create an image is by pulling a Docker image, creating a container from it, and then modifying or making changes in it like installing our app in that container. Now, using the docker commit command, we can create a Docker image from the container.


Let's look at an example of how to create a Docker image from our example_app container:

1
2
3
4
5
6
$ docker ps -a
CONTAINER ID     IMAGE      COMMAND    CREATED               STATUS              NAMES
c3df2dd33276  example-image "date"  5 seconds ago   Exited (0) 4 seconds ago  example_app

$ docker commit example_app example_image2:latest
sha256:7b48e8355aa7a7ea32d554f26d0bd21f4d069d8526c68f1d098acac9111a9adf


Now enter docker images -a to view newly created image


Publish an Image to Docker Hub

To be able to publish our Docker images to Docker Hub, there are some steps that we need to follow:

Step 1: Sign Up for Docker Hub

Before we can push our image to Docker Hub, we will first need to have an account on Docker Hub. Create an account by visiting this link. The signup process is relatively simple.

docker_hub_sign_up_page

Step 2: Create a Repository on Docker Hub

For uploading our image to Docker Hub, we first need to create a repository. To create a repo:

  1. Sign in to Docker Hub
  2. Click on ‘Create Repository’ on the Docker Hub welcome page:

docker_hub_home_page

  1. Fill in the repository name as example-image, the Docker image that we created earlier using Dockerfile. Also, describe your repo like "My First Repository". Finally, click on the create button. Refer to the below screenshot:

create_repository_page


Step 3: Push Image to Docker Hub

Now we will push our built image to the Docker Hub registry:

  1. Log into the Docker public registry from your local machine terminal using Docker CLI:

    1
    $ docker login
    shell
  2. Tag the image

    This is a crucial step that is required before we can upload our image to the repository. As we discussed earlier, Docker follows the naming convention to identify unofficial images. What we are creating is an unofficial image. Hence, it should follow that syntax. According to that naming convention, the unofficial image name should be named as follows: <username>/<image_name>:<tag_name>. In my case, I need to rename it as gauravvv/example_image:latest

  3. Publish the image

  4. 1
    $ docker push gauravvv/example_image:latest
    shell

    Upload your tagged image to the repository using the docker push command. Once complete, you can see the image there on Docker Hub. That's it; you have successfully published your Docker image. If you want to test out your image, use the below command and launch a container from it:and launch a container from it:

    1. 1
      2
      $ docker pull gauravvv/example_image:latest
      $ docker run -it gauravvv/example_image:latest
      shell

    Bonus: Pushing to a Non-Docker Hub Registry

  5. So far, we have learned how to create a new Docker image, tag it, and push it to the Docker Hub. While using Kubernetes or OpenShift, we would use the internally hosted Docker registry; some organizations also prefer to host their own internal private registry. Therefore, you should know how to publish your Docker image to an internally hosted Docker registry. Luckily, Docker made it more accessible, just like publishing to Docker Hub but a little bit different.

    Step 1: Log in to a Non-Docker Hub Registry

    Use the docker login command to log in to the specified registry and to tell Docker which registry we want to sign in to.

  6. 1
    $ docker login registry.example.com
    shell

    Step 2: Tag the Image

    As you may remember, for publishing our image to Docker Hub, we have tagged the image to include the username at first. Now, to publish to the internal registry, continuing on that pattern, we will also add the registry name at first, followed by a username, then followed by image name. Therefore, the final syntax will look like this:<registry>/<username>/<image_name>:<tag>. Let's take a look at an example:

    1
    $ docker tag gauravvv/example_image registry.example.com/gauravvv/example_image
    shell

    Step 3: Push the Image

  7. The docker push command takes the name of the image. It will know where to push our Docker image by looking at the image name because the name contains the registry location. By looking at our image name, which is registry.example.com/gauravvv/example_image , it will determine that we are pushing an image name, example_image, to a user's repository, gauravvv, at the registry registry.example.com.

    1
    $ docker push registry.example.com/gauravvv/example_image


How to upgrade Maven

  java.lang.IllegalStateException I had installed maven in my ubuntu using command  apt install maven This installed maven in path /usr/shar...